


Top 10 Heat Transfer Vinyl Tips for Long-Lasting Designs
Heat Transfer Vinyl (HTV) is a game-changer if you love creating personalised clothes, bags, or home projects. There’s something special about seeing your own design come to life on fabric—it just feels amazing! But here’s the thing: not every design lasts. Sometimes, it can peel, crack, or fade after just a few washes.
Don’t worry, though. I’ve been there, and I know the frustration. The good news? With a few simple tips and tricks, you can make your HTV creations stay vibrant and flawless for a long time. In this guide, I’ll walk you through my top 10 Heat Transfer Vinyl tips—everything from picking the right vinyl to caring for your finished project. By the end, you’ll feel confident creating designs that look professional and last wash after wash.
What is Heat Transfer Vinyl (HTV)?
Heat Transfer Vinyl, or HTV, is a special type of material used to create custom designs on fabrics like t-shirts, hoodies, bags, and more. It’s a thin, flexible vinyl sheet that can be cut into shapes, letters, or intricate designs and then transferred onto fabric using heat.
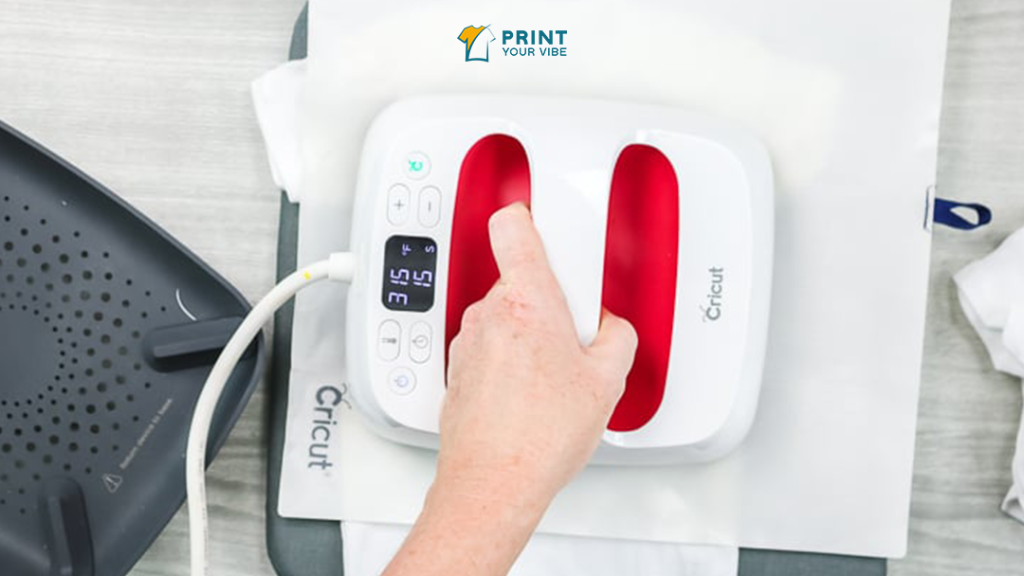
HTV has a sticky side that bonds to the fabric when heated with a heat press or iron. The other side is a protective carrier sheet that keeps the design intact while you handle it. Once pressed, the vinyl sticks firmly to the fabric, creating vibrant, durable designs that can last for many washes if applied and cared for properly.
There are different types of HTV depending on the material and effect you want. Some are matte, glossy, glittery, or even metallic. There are also speciality vinyls made for stretchy fabrics, light-colored fabrics, or outdoor-use items.
Using HTV is popular for DIY projects, custom gifts, and small business products because it’s easy to use and allows for endless creativity. With the right technique, your designs can look professional and last a long time.
Top 10 Heat Transfer Vinyl Tips
1. Choose the Right Vinyl for Your Fabric
Choosing the right Heat Transfer Vinyl (HTV) for your fabric is one of the most important steps in creating long-lasting designs. Not all vinyl works on every type of fabric. For example, standard HTV works great on cotton and cotton blends, while speciality vinyls, like stretch or adhesive types, are better suited for polyester, spandex, or performance fabrics. Using the wrong type of vinyl can lead to peeling, cracking, or uneven adhesion, even if you follow all other steps perfectly.
Before you start your project, always check the manufacturer’s recommendations. They usually provide a guide that lists compatible fabrics, temperature settings, and pressing techniques. This small step can save a lot of frustration and prevent wasted material.
Additionally, consider the texture and weight of your fabric. Thicker fabrics may require higher pressure, while lightweight fabrics need a gentle touch to avoid damage. By selecting the right HTV for your fabric and following the guidelines, you set your design up for success, ensuring it looks professional and stays vibrant even after many washes.
2. Pre-Wash and Dry Your Fabric
Pre-washing your fabric is a small step that makes a huge difference. Factory-finished fabrics often have chemicals, oils, or sizing that can prevent vinyl from sticking properly. Washing removes these residues and ensures a clean surface for adhesion. Avoid fabric softeners—they leave a coating that can interfere with the vinyl’s bond.
Make sure your fabric is completely dry before pressing your design. Any remaining moisture can affect how well the vinyl adheres, causing bubbles or lifting edges later. Pre-washing also reduces shrinkage after your design is applied, keeping your project looking perfect wash after wash. Taking these simple steps guarantees a stronger, longer-lasting design.
3. Use the Correct Cutting Settings
Every vinyl brand has recommended cutting settings. This includes the blade type, cutting pressure, and speed. Using the wrong settings can tear your vinyl or ruin intricate designs. If you’re unsure, test a small piece first to ensure the settings are correct.
The right settings create clean, precise cuts and make weeding easier. Weeding is the process of removing excess vinyl around your design, and having smooth edges helps prevent peeling. Following the proper cutting instructions saves time, reduces waste, and ensures your design looks professional and polished.
4. Pre-Press Your Fabric
Pre-pressing your fabric removes wrinkles, moisture, and static, creating a smooth surface for vinyl application. This step is essential for avoiding bubbles and uneven edges in your design.
Even if your fabric looks flat, a quick pre-press for a few seconds ensures the heat from your press or iron is distributed evenly. Pre-pressing also helps eliminate folds that can distort your vinyl, giving your finished design a cleaner and more professional look.
5. Peel at the Right Time
HTV comes in two main types: hot-peel and cold-peel. Knowing which one you’re using is crucial. Peeling too early or too late can lift edges or damage your design.
Follow the manufacturer’s instructions carefully. For hot-peel vinyl, peel while the material is still warm. For cold-peel vinyl, wait until it cools completely. Taking the time to peel correctly ensures crisp edges and prevents small sections from lifting, giving your design a polished finish.
6. Apply a Finishing Press
After peeling the vinyl, apply a finishing press for a few seconds. Cover your design with a Teflon sheet or parchment paper to protect it from direct heat.
This step locks the vinyl into place and smooths out minor wrinkles, ensuring your design adheres fully. A finishing press also strengthens the bond between the vinyl and fabric, making your creation more durable and long-lasting.
7. Wash and Care Instructions
Proper care is essential for keeping your designs looking fresh. Turn garments inside out before washing to reduce friction on the vinyl. Use cold water and gentle detergent, avoiding bleach or harsh chemicals.
Hang-dry if possible, or tumble dry on low heat. Following these simple steps prevents peeling, cracking, or fading, keeping your HTV vibrant for many washes. Proper care extends the life of your creations and keeps them looking professional.
8. Avoid Stretching Your Fabric During Pressing
Stretching your fabric while pressing can cause the vinyl to lift or distort. Always keep your material flat and taut without pulling or stretching it. This is especially important for designs on t-shirts or other stretchy fabrics. A stable surface ensures even heat distribution and strong adhesion, giving your design a professional finish.
9. Store Your HTV Properly
Unused HTV should be stored flat, away from heat, sunlight, and moisture. Improper storage can cause the vinyl to curl, stick to itself, or lose adhesion over time. Keep rolls or sheets in a cool, dry place to ensure consistent results for future projects. Proper storage protects your investment and makes your next project easier and more enjoyable.
10. Take Your Time and Practice
Finally, patience is key. Rushing through the process can lead to mistakes, peeling, or uneven designs. Take time to measure, align, press, and peel carefully. The more you practice, the more confident you’ll become with different fabrics and vinyl types. With attention to detail and consistent techniques, your designs will look professional and last for years.
How to Remove Vinyl Heat Transfer
Sometimes we need to remove Heat Transfer Vinyl (HTV) from a fabric. This could be because of a mistake, a redesign, or simply because the design is old or worn out. Removing heat transfer vinyl carefully is important—you want to get rid of the HTV without damaging the fabric underneath. Here’s a step-by-step guide to make it easier.
1. Gather Your Tools
Before you start, make sure you have everything you need. You’ll want:
- A hairdryer or heat gun to soften the adhesive.
- Tweezers or a heat transfer vinyl weeding tool to lift the edges carefully.
- Rubbing alcohol or adhesive remover (optional) to clean off any leftover sticky residue.
Having the right tools ready makes the process smoother and safer for your fabric.
2. Heat the Vinyl
The key to removing heat transfer vinyl easily is heat. Use a hairdryer or heat gun to warm the vinyl. Heat softens the adhesive, making it easier to peel. Keep the heat moving across the surface and avoid holding it in one spot too long, or you could scorch the fabric. Take your time—this step is crucial for a smooth removal.
3. Peel Carefully
Once the vinyl is warm, use tweezers or a weeding tool to lift a corner. Slowly peel the vinyl away from the fabric. If it resists or tears, apply more heat and try again. Work patiently and gently—rushing may damage your garment or leave small pieces stuck behind.
4. Remove Residue
After removing the vinyl, some adhesive might remain on the fabric. Lightly dab the area with rubbing alcohol or a fabric-safe adhesive remover. Test a small area first to make sure the product won’t damage your fabric. This step helps restore your fabric to a clean, ready-to-use state.
5. Wash the Fabric
Finally, wash the fabric to remove any remaining adhesive or cleaning solution. Use cold water and mild detergent to protect the fabric. Air-dry if possible, or tumble dry on low heat. After this, your garment is ready for a fresh design or safe storage.
Pro Tip: Be patient, heat first, and peel slowly. With careful handling, you can remove Heat Transfer Vinyl vinyl from almost any fabric without damaging it, giving your materials a second life for new creative projects.
Frequently Asked Questions (FAQs)
HTV is a special type of vinyl used to create custom designs on fabrics. It has a sticky side that bonds to fabric when heated and a carrier sheet that protects your design while you work.
HTV works best on cotton, polyester, and blends. Some speciality vinyls are made for spandex, nylon, or performance fabrics. Always check the manufacturer’s instructions for fabric compatibility.
You can use a household iron for small projects, but a heat press gives more consistent results, especially for larger or intricate designs.
Yes! Turn garments inside out, use cold water and gentle detergent, and avoid bleach. Hang-dry or tumble dry on low heat to keep your design vibrant for many washes.
Yes, old or mistaken designs can be removed. Use heat to soften the adhesive, peel carefully, and clean any residue with rubbing alcohol or adhesive remover.
There are matte, glossy, glitter, metallic, stretch, and speciality vinyls for different fabrics and effects. Choose the type based on your fabric and desired finish.
Yes, for text or images that face a certain way, mirror your design before cutting so it appears correctly on the fabric.